Hello, everybody! Today I have a fun little project for you guys! I've recently been busy cleaning up my room and doing multiple deep cleans of my closet, my drawers, all the way down to my bookshelves and just getting my room in order to clean out all the gunk. I've also been busy looking for different ways of getting my things more organized and out of the way. I plan on writing a post about that so please stay tuned as I will let y'all know when that post goes up, but anyway, I recently made this little doodad that I thought some people might be interested in making for themselves.
I've been wanting a phone stand for my phone for the longest time but I could never find one I liked. All the phone stands actually looked like phone stands. I know that sounds weird like "Duh, it's a phone stand, why wouldn't it look like one?" But I have this issue of wanting literally EVERYTHING to be personalized to me. What can I say? I surf a different wave length. SUE ME. Anyhoo, I thought I should just make my own phone stand and while cleaning out on of my craft drawers, it was like all the supplies just appeared out of nowhere and the idea in my noggin sprouted. This is the result.
___________________________________________________
SUPPLIES:
▫ Thin board (in my case I used the slip cover for the box my cell phone came in) ▫
▫ Scissors ▫
▫ Tape ▫
▫ Decorative paper ▫
▫ Glue or mod podge ▫
▫ Pencil ▫
OPTIONAL:
▫ Poster Putty ▫
▫ Phone ring stand ▫
▫ Stickers ▫
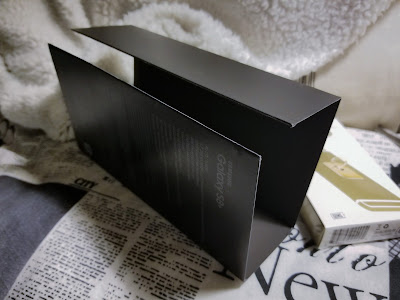
The first thing I did to start off making my phone stand was cutting along one of the long edges of the box to open it up. To be honest, I had no idea what I was planning on doing to create the kind of phone stand I had in mind but as I went about trying to make the stand, I found it was actually pretty simple.
The next thing I did was I folded down one of the wider sides until the edge met with the inner crease of the box, leaving one of the sides folded out and I taped down the edge. I then folded the left out flap three times to create creases before folding the flap up to create the shape of a triangle, the edge meeting with the inner crease and the edge of the wide flap that I had just taped down. I taped down the smaller flap, creating the look of two triangles taped together.
Simple right? I really hoped those previous steps made sense. Once you have the base complete you can stop here or move on to decorating the stand to make it more personalized. For me, I took some scrapbook paper and glued the pieces down to the front and back side of the stand. I left the smaller edge black because I liked the contrast between it and the patterned paper but you can obviously cover it up as well or paint the whole thing. I didn't bother decorating the bottom of the stand since you won't be able to see it anyway but go ahead and decorate it too if you like.
After gluing down all the paper, I took a postcard of one of my favorite music artists and glued it down in an overhanging position. I thought it looked cool having some of the paper peeking through and having the postcard hanging over the edge a bit. I also placed my phone on the stand once I had glued down everything and thought that the phone rested just a little bit too low for my personal liking. I wanted my phone to rest more at an angle. I decided to use a phone ring stand I had picked up at Target a few months back that I just never ended up using. I placed it to where it wouldn't obscure much of the postcard and found the ring lifted up the phone just perfectly!
This is what my phone looks like resting on the stand. I had played with the idea beforehand of using the phone ring to prop up my phone a bit so that's why all of a sudden the decorative paper is gone. BOOM, MAGIC. I also had to edit my phone into the picture since I use my phone to take pictures and just having the phone case resting on the phone stand looked a bit weird. ANYHOO, I'm transparent, you get the idea. Enjoy my home screen.
And here is the finished phone stand! I decided to also add the band logo to make it a bit more obvious as to who all the people were in the postcard. I love having this on my desk to be able to rest my phone on if I don't need to have it next to me. I also put some poster putty on the bottom of the stand to keep it from sliding but you can also use tape if you don't have any putty.
So that is it for this little mini DIY! I hope some of you were inspired to make a phone stand of your own like this or were simply inspired to maybe look around your room for things you could potentially turn into something else. I plan on using some of the leftover space of my phone stand to place a pad of sticky notes should I need to jot something down real quick or you could even place a mini month calendar, the possibilities are endless. Again, I really hope you guys enjoyed so until next time, read on bookworms! See you in the next chapter!


No comments:
Post a Comment